This section will probably grow as I get the energy to get deeper into specialized tools, but I thought we’d get started with the basics.
In the first place you don’t need anything exotic although there are a couple of things you can’t do without and there are a couple that make life a little easier.
Can’t Do Without This
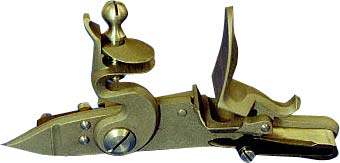
The first time you pick up a lock, be it a flintlock or a cap lock, you’ll work the hammer back and forth and immediately realize how it works. Don’t let them fool you, however. They can be pretty sophisticated in their simplicity and there are quantum leaps between the cheaper locks and the better ones and the differences are in details you and I can’t even see. DON’T BUY ON PRICE! A cheap lock is like doing a heart transplant and getting the heart from the lowest bidder.
We’re using Siler locks here because they are the standard and because they are close to the style of the Lancaster rifle we’re building and right for the period.
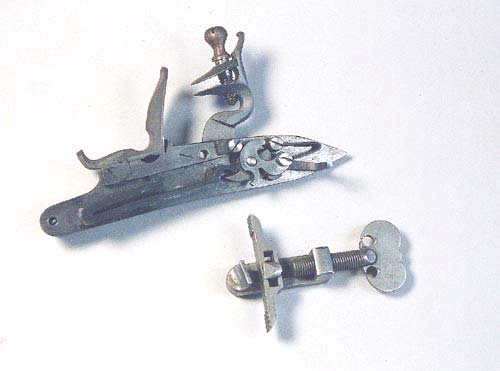
Don't let anyone kid you, getting that spring off
without
a vice is a bear
Part of the way a lock can fool you is that you think you can get them apart with a screw driver. FORGET IT! Take a look at the springs. Both types of locks have the main spring in the back and the flintlock has the frizzen spring up front. These may not look like much but you’re sure to damage a lock if you don’t un-tension these springs before you remove any of the screws.
The springs put everything under tension and if you try to take a screw out it’ll bugger up the end of the threads as you try to get it out. Besides, it’ll be a real bitch getting the screw out in the first time. To take tension off the clockworks you need to compress the spring. This much is obvious even after a cursory examination of the lock. What isn’t obvious is that it isn’t easy to compress the spring.
This little bugger doesn't look like much, but it'll save you
a lot of heartburn.
The first thought is to use a little C-clamp. Good idea, but the springs are so narrow and have so much slope to them the clamp can’t get a good purchase on the spring.The next thought is the pride of Dewitt, Nebraska, the Vice Grip (all true Vice Grips come from Dewitt, not far from my hometown). These “might” work, depending on how you feel about leaving gouges on springs and such—really bad idea and smacks of MM (Mickey Mouse).
Enter the spring vice. This is a little gadget you should buy right along with your Kentucky parts. It has rotating jaws that are specifically made to span the length of a main spring and let you compress it with a couple turns of the thumb screw. Go to Trackofthewolf.com to order tools and parts. They also have kits, but Dunlap’s feature better wood and select parts.
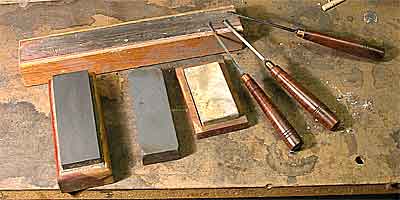
Yep, these are all you'll need for a Dunlap kit and you'll be
using the red 1/4" more for scraping than anything else.
Chisels: don’t chintz on these
A surgeon isn’t going to wade into a quadruple bypass with a Swiss Army knife and you shouldn’t try to work curly maple with anything but topnotch chisels.
They are available from a number of sources but get the best money can buy. You’ll use them for the rest of your life, so don’t screw around with middle of the line stuff. You can use “palm chisels” if you want, but I’ve always found them too short for general use. They’re great for fine carving, but we may or may not be doing any of that on this piece.
You’ll need the following blade types:
-straight 1/16”
-straight 3/16”
-straight 1/4”, this can be a simple Stanley type tool since you’ll use it as a scraper.
-gouge, 5/16, make this a medium radius to get into corners of curved mortises.
I have probably fifty chisels, but these are the ones used most and are all you’ll need for this project.
You’ll also need sharpening stuff as follows:
-medium stone to start working the blade
-black stone to set final shape
-white stone to put glass smooth edge on it
-LONG leather strop to really put an edge on it.
You can make your own strop by gluing a 16” long piece of belt leather on a board. Then moisten it and rub (they call it “charging” it) coarse rubbing compound like you’d use on paint into it. Really soak the leather with it and work it in. I’ve used a lot of different stuff and it all works okay, but Simichrome polish, if you can find it seems a hair better than the other stuff.
The strop is nothing but belt leather charged with rubbing compound. Use it religiously. No, ignore that. Use it much more than you use your religion.
This strop is going to sit right there in front of you every second you’re working wood and every two or three cuts you’re going to wipe the chisel across the strop. If you get in the habit of doing that, you’ll never tear a piece of grain out because you waited one cut too long to sharpen your blade.
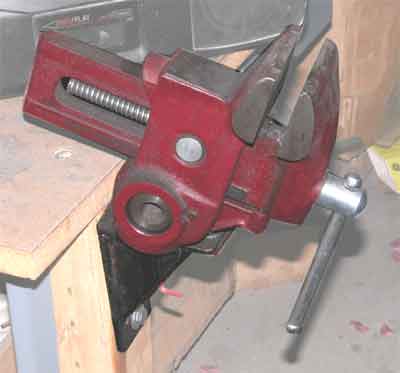
The Bench Vice
There are vices and there are vices and the only really important aspect of a vice is that you have one and that it be bolted securely to a bench that doesn’t move under pressure. A lot of folks use a special cradle on the bench to work rifles, but we’re not going to get that sophisticated, so we’ll make do with a vice.
If you can find a unit known as a Vice Versa, they make life much easier. They pivot in three dimensions and make it easier to position the piece for easy whacking. God knows we don’t want to be whacking at the wrong angle, right?
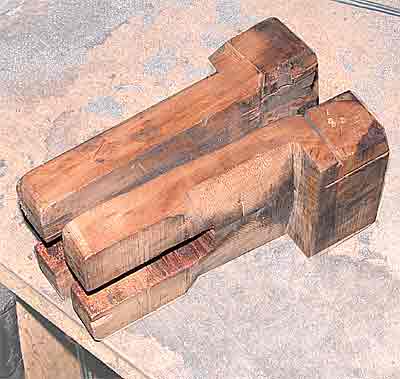
The Versa Vice moves in three-dimensions but even without one make a set of blocks for any vice and radius the back of one so it can rotate and align with odd shapes.
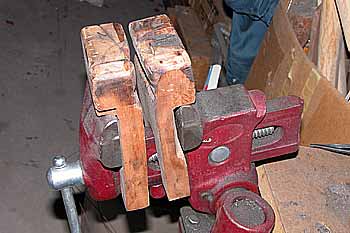
Regardless of what vice you’re using, make a set of blocks like I’ve illustrated here. Mine are pretty beat up because they’ve seen a lot of use, but you can’t work without them.
The blocks not only protect the rifle from the jaws, but we can cut grooves in the face of the block that match parts of the rifle and let you grab it more securely.
Notice in the pictures that the back of one of the blocks is radiused slightly. This is to let one of the blocks rotate in the vice so it can self align with tapered parts of the stock.
Don’t get too exotic with the wood, but make sure it’s a relatively hard wood. You’ll need to start with something about two inches thick, which can be hard to find. Here again, don’t get too caught up in the details: find an old shipping skid and jerk one of the big pieces off the bottom. If it’s not thick enough, glue two pieces together and get out your saw. Or better yet, break out the band saw.
Also, notice the notch in the bottom legs: it has to straddle the screw in the middle of the vice.
Keep an old sweatshirt laying behind the vice because you’re going to be using it as padding to protect the stock in the vice. Doubled up carpet works better.
Transfer medium
You’re going to need something to rub on the back of parts as you try to inlet them into the wood. Where they are touching, they’ll leave a smudge of the medium. Here again, simple works: lip stick will do the job. A better bet is to get inletting black from Brownells.com. If you don’t have their catalog, you should. Even though 99% of the stuff in it isn’t applicable to this project, it’s a great resource for all sorts of stuff that’s gun related but useful in other areas too.
Drilling holes
You can this entire project with a steady hand and a 1/4” drill but having a drill press makes life much, much easier. If you don’t have one, don’t rush out and buy one for this project. I can think of only one hole that should be done in a press and that’s the touchhole and only then if you plan on threading it and putting a unobtainium liner in it. Otherwise, just hand drill it and try really hard to make it a square.
As we get into the different operations and other tools pop up (since I’ve probably forgotten some) we’ll get into them at that time.