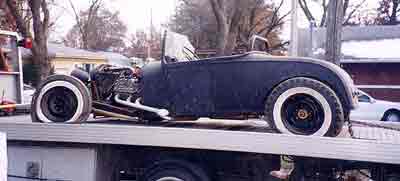
This is how she looked when pulled out of the barn after 42 years. Bedstead headers look kool, don't they?
Heading In the Right Direction
“Bedstead headers are a hard act to follow”
Being young, with a world that only extended as far as the newsstand and the cornfield past that, it’s funny what sometimes sticks in your mind as being cool and necessary. The whole hotrod idea was both. But it went further than that. Certain other images, some of them not in the hotrod vein had their stamp on the hotrod image itself. One of these was sprint car headers.
Dad took me to see some sprint car races when I was about 14 and for some reason, the shape of their exhausts struck me as being so unbelievably beautiful. The flowing lines from which horsepower galloped at higher-then-human decibels were, to me, the very embodiment of speed. Anything that was going to go fast or, more important to me at the time, was going to look as if it went fast had to have headers like that.
At the same time, circa 1957, there was a short lived comic books series (I’ve tried to remember the name for years, but keep coming up blank) built around hotrods and the hero drove a channeled deuce roadster with a headrest (which I REALLY loved) and it had sprint car type headers. So, it was a foregone conclusion that this car was going to have over-the-frame, sprint car type headers, even though few of the magazine cars that were my inspiration had them. So, almost as soon as I had the flathead sitting in the car, it was header time. They were entirely too cool to wait on.
This is how she looked when pulled out of the barn after 42 years. Bedstead headers look kool, don't they?
One of the identifying characteristics of being from a rural farming community is that you don’t look much further than your own scrap pile when you start building something. You make do with what you have. In this case, dad had a bunch of old bedsteads out in back of the store and it never once entered my mind to go down to Keller’s in town and buy some exhaust tubing. The bedsteads had big swoopy bends and were about 2” (1 7/8ths as I found out recently) in diameter.
The most important factor about the bedsteads however was that they had the two most important ingredients needed for a farm boy hotrodder: they were close at hand and they were free.
In those days I was great on concept but a little short in the execution area. In this case, when it came to making a mounting flange, I simply got a big piece of quarter inch steel strap, put an exhaust manifold down on it to trace the hole locations and, you guessed it, fired up the cutting torch. In a few minutes I had a couple of exhaust header flanges, complete with squiggly holes and slag-covered edges. With that kind of craftsmanship, it’s lucky that “jeweler” wasn’t one of my career choices.
I started whacking at the tubing (I had lots to work with) with the torch and was satisfied if the gaps were less than a quarter inch wide. I’d gotten pretty good at globbing brazing rod into big gaps so I wasn’t too concerned about exact fit. Actually, that statement pretty much described the entire car! Exactitude wasn’t much in evidence anywhere.
Before long, I had the headers I wanted and they definitely had the “look,” if not the detail. And they had the desired effect. They looked fast. They sounded fast. And they were guaranteed to get me in trouble.
 |
I have to be honest: I tried like hell to save those headers. In actual fact, I did save them. I did lots and lots of welding and patching and put new flanges on them. In the end, however, when I put a caliper on them and found they were something like .025” thick, I knew they wouldn’t work. In regular street use, their life span would have been measured in hours, which would be a problem. I plan on driving the car regularly, using it as a second car (in Arizona we can do that kind of thing), so, it was on to plan B.
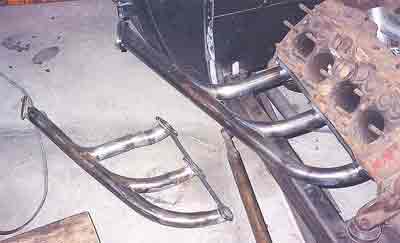
I had already built the new frame, so I’d pretty much trashed the gotta-be-as-it-was-in-high-school rule and the headers were the next move. Still, the new headers had to look exactly like the old ones. Only better.
I got a couple of exhaust flanges from Red’s Headers and then start looking around for tubing with the right bend. And I looked. Then I looked some more. No dice! ‘Couldn’t find anything with the right bend radius.
The problem was that the bedsteads were bent on a 6” radius, which is what gave them that swoopy, art deco look and the closest I could come were 3” bends, if they were done on a mandrel. Finally I gave up and actually welded up the main tube and a bend to the front port using 3” radius tubing. But it just didn’t look right. It looked too…too…I don’t know… they just looked too modern.
Then one morning at 3 am, it hit me. I leaped out of bed and started leafing through the yellow pages. Then I paced around the house for about five hours waiting for people to get to work so I could call them.
Do you know how lazy you think people are when it’s four am and they aren’t answering their phones at work yet? Lazy bastards!
Finally the doors opened for business and I made the call.
 |
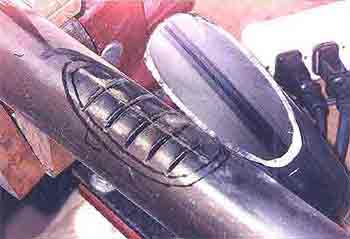 |
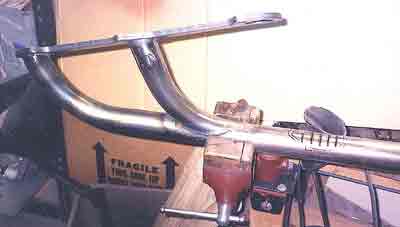
Not being able to find a roller to do the tube on, I found an outfit that was really good with a press break and we made the tubes in two halves (14 gage) by breaking them about a billion times a fraction of a degree at a time. When finished, I chamfered the edges of the halves to get most of the weld deep into the steel and welded them together. When I ground the beads off, you couldn’t see a single discontinuity to tell the cones had been bent a million times.
 |
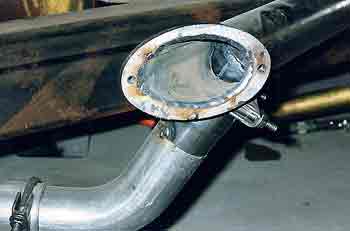
Something I should mention are the slanted end caps. To make sure they matched, I tack welded the rough cut pieces together and then band sawed them to shape and sanded the edges smooth with them stacked as a unit so even if they weren’t perfectly shaped, they are least matched to each other .
The real pain was cutting the big oval-shaped hole in the base piece that’s welded to the collector tube. I traced the outline of the angle cut of the collector tube on a cardboard pattern, then transferred that outline to a cap piece after it was final shaped. I then drilled a couple of half-inch holes in the middle of the outline.
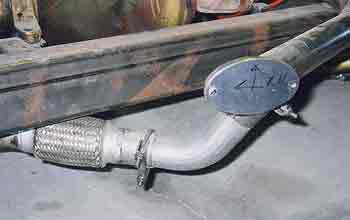
I have one of those cheap Taiwan metal cutting band saws ($199) and cut to the half-inch holes from one side of the flange. From that point on it was a matter of sitting at the bandsaw like a robot doing the same routine over and over: cut, back up, cut at a different angle, cut again to insect that angle. Remove the tiny wedge-shaped piece. Cut, cut cut. There must have at least 50 feet of cutting to take out that big hole one tiny piece at a time. When I was finished, I welded the saw cut in entry in the edge of the flange closed.
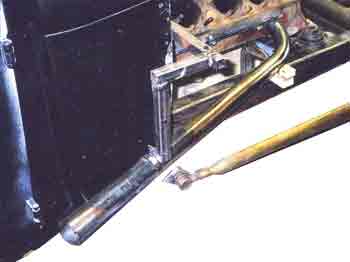
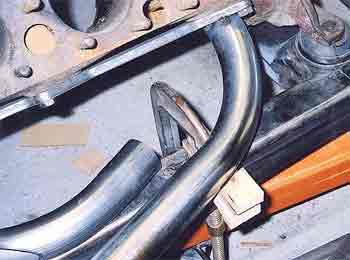
A bigger pain was making the tube on the left rear that has to go over the steering box. I still don’t like the looks of it, but it’s close.
My plan for the headers is to cermichrome them. I can’t afford real chrome and one of my clients does a lot of cermichroming (the polished, aluminum ceramic coating) and he’s going to toss the headers in with one of his orders.
Am I happy with the semi-final result. Yes, I’d say so. I still can’t keep myself from grinning when I look at them. I definitely got the “look” I was after and they are so close to the originals you’d have to measure them to tell the difference. That is you can’t tell the difference if you ignore the glaring difference in detail work.
 |
 |
I know the first time I fire that engine up I’m going to hear a voice in the distant past, “…and I have to live in this town.” This time, however, everyone will know it’s me, the past middle-aged guy next door, ripping back and forth at night with no father to reel him in. Pity!
 Exhaust System Blues
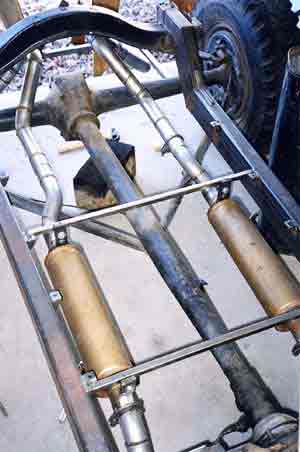
First, those gold mufflers you're looking at are the originals that I put on the car in 1958. They were $3.19 at Sears and are glass packs. It's interesting to note that there's a big Owens-Corning logo on the mufflers because they were one of the first to make that kind of glass available to young guys.
There's nothing notable here except that rather than having custom pipes bent, I simply scrounged a whole bunch of different 2" pipes that looked as if they had a wide variety of bends and started cutting and welding.
The tailpipes drop straight down behind the rear end to go under body panels that give a really deep trunk space behind the rear cross member. More on that later.
The rear end shown is the original Model A from the old days, but I have a freshly rebuilt V8 rear of unknown vintage put together out of at least three different rear ends, but I had to weld spring hangars on it.